
Wednesday, November 6, 2013
Baby shower tea party invite
Another Pinterest idea. I found the template for this online, though now that I'm trying to find it again, it's no where to be found. So sorry! There are lots of templates online, I just can't find the specific one we used. My BFF and I traced and cut out 24 of these! We used purple, lavender and pink card stock for the base and I found some cute pink and white gingham paper, felt kind of like fabric, on mega clearance at JoAnn's, which is what we used for the tops of the invite, adding some dimension to it. We got tons of compliments on our efforts! =)

OWLS!
This has become one of my newest obsessions - I found the idea on Pinterest and have changed it from the original, which was for an ornament. My wonderful husband and mother in law have been able to make bigger templates for me and I have 4 different sizes now! The first one that is shown was made for my 2 year old - it was the second one I'd made, the second picture is the first one I made. Once Ryann saw it, she had to have one and wouldn't leave me alone until it was finished! I am NOT a sewer - this is just felt, some fabric glue and embroidery floss. My mother in law taught me the "blanket stitch" to finish the edges to make them look nice. That was such a help!!! The final pic is the one that I started this whole project for - I wanted a "hooty owl" on my burlap wreath. I plan on making 3 of these, in graduated sizes, for Christmas in traditional Christmas colors. I will also eventually make the original ornament =)


Sunday, June 30, 2013
Foot surgery project
I have recently been working on changing the theme in our bathroom to owls. I decided a while ago that I wanted to do a cross stitch of owls and it took me forever to find one that I liked. I ordered this from eBay, it is from the 1950s (Jane Snead Samplers "Keepsake Needlework" No. 497 OWL COUPLE), I believe. The kit was complete, still in original packaging! This kit only came with 5 different colors of thread (red, purple, light blue, blue and orange). NONE of which I liked. The design was pre-printed on linen. Obviously, I changed all of the colors, making it match the decor in our bathroom. I worked on this for about 3 solid weeks while I was recovering from foot surgery and couldn't really do much else. It was a great way to pass the time! I LOVE how this turned out! I changed the design a bit, too - I gave the male a little "suit" and put a dress and a necklace on the female, giving it way more personality than the original had. I bought a plain wood frame which my fantastic MIL painted white and then she matted it for me. Did I mention that I love this?! =) We have plaster walls throughout our house, making it almost impossible to hang things on the wall so I am waiting for my FIL to come over to put a nail in the wall so that it can hang in it's reserved place in the bathroom. I can't wait!!!


Father's Day gift for Poppy
It seems that it's always easy to come up with gifts for the Grandmas, no matter wha the occasion. Poppy, on the other hand, is a totally different story. As you know, I am a Pinterst addict! I did some research before Father's Day, hoping to find something that was just so amazing that I had to make it! I was determined to make something for Poppy this year, no matter what. I found some cute ideas, told hubby that he was going to help me make the gift this year as *I* made all of the Mother's Day gifts, including my own. I found a simple idea - a cute little frame to put a photo in for Poppy to hang up in his office. (he is BIG into electronics from stereo equipment to old TVs and computers) Hubby took this even further, taking 3 hours to complete this project! He took out the circuit board of an old DirectTV receiver and cut - cutting it down to size and then cutting out the center hole for the photo. We were so pleased with how it turned out but DANG! I'm glad he was the one on the porch, in the heat with a saw and drill! This gift is really appropriate and so cute! Yes, we left the components on the frame so that you can tell it is a real piece of equipment. I do NOT recommend this project but think it is really great! I made a simple sign, using a crayon and a plain piece of paper, clipped on a clipboard and took an Instagram photo of Ryann.

Monday, May 13, 2013
Mother's Day gifts, 2013
I found this idea while looking through the ads one Sunday morning. Old Time Pottery had these advertised for $8.99. Not a bad price but I knew that I could make one and decided that it would be a great Mother's Day gift for the grandmas (and of course I had to have one too!)
This project took a while to do, not because it was hard but because the wood soaked up the paint so quickly, I had to paint things 3 times to make them look right! I bough the wooden plaques at JoAnns, with Qpons. Painted each one in colors that coordinate with decor in our homes (mine will hang in my "Irish" kitchen, hence the bright green). I used a Sharpie paint pen to write on the wood, once all of the paint was dry. I'd thought about cutting out letters with my Cricut and doing a Mod Podge thing but decided against that - way more work than I wanted to do! We used Crayola Washable paint for Ryann to put her hand and fingerprints all over. Once dry, we used a spray varnish to set it all. (I always use varnish on wooden projects but with the washable paint on this one, I wasn't sure if I could use liquid varnish and didn't want to mess it up!). Then, with super bond glue, I added the metal clips (these are magnetic, found in the stationary section at Wal-Mart). The ones that I saw in the ad had 3 clips on them but I thought that made the plaque too crowded - gotta have room to hang up Ryann's handy work (pun intended) =)


Monogrammed Burlap wreath
I don't spend tons of time looking through Pinterst (because I don't have tons of FREE time) but I do enjoy looking at ideas, even if I know that I'll never have the time to make them! This idea, however, I wasn't able to get out of my mind! I didn't follow any directions from Pinterest. Not exactly. I used a metal 18" wreath - it has three 'layers', slots to put things in. I bought burlap ribbon at Hobby Lobby (I ended up using 1 whole roll and about 3/4 of a second roll). I tucked the ribbon through the wreath, alternating top row, bottom row, pinching the burlap at the bottom, wrapping the bottom of the burlap with floral wire to hold it's shape and then wrapping it around the wreath to hold the loop in place. Some tutorials called for cutting the burlap and making separate loops. That seemed like way too much work to me! I kind of made this up as I went along. Much to my surprise, it was symmetrical when I was finished!!! After lots of though, I decided that burlap doesn't need any decoration. It kind of says it all just by itself. I DID see lots of monogrammed wreaths on Pinterst and loved that idea! So,yep, I bought I wooden "F" (for Fischer) on sale at Hobby Lobby and painted it with teal paint, adding varying sizes of circles that I painted in chocolate brown and Papaya orange. My mother in law used a darker teal/blue to do some shading around the "F" to make it stand out against the burlap and to give it some depth. (I found a metal flower to hang on my front porch that had these colors in it, I wanted to tie the 2 together, kind of matching the colors of the brick of our house). I LOVE how this wreath turned out! I normally change my wreaths for the seasons but I think this one will be hanging up year-round, at least until I get tired of it! =)


Sunday, May 12, 2013
Ryann's new door plaque
While pregnant with Ryann, I made things to hang in her room or to sit on the dresser, etc. A lot of the things that I made had a princess theme, which I was so in love with because we were having a GIRL! As she has gotten older, I am starting to think about child rearing more and more (obviously). The media has helped me (or hurt me, not sure which, yet) in that I see how women are perceived, how celebrities get berated for being "overweight" and how much pressure is put on appearance, etc. This bothers me on so many levels! While I have always said that Ryann is OUR princess, I certainly don't want to put the pressure on her to BE a princess! I started thinking about this a few weeks ago and have totally stripped her room of anything that says 'princess' on it. I want her to grow up to be independent with self-confidence and a sense of self worth. Does this make a difference right now with her being only 2 years old?! I have no idea. Though I don't know that I want to take the chance and find out. She now has a canvas print that says "Always remember that you are loved" and a print by Emily McDowell that is a quotation by Eleanor Roosevelt that says "No one can make you feel inferior without your consent". The door plaque that used to be on her door said "Princess Ryann". I painted this plaque from Michael's and used chipboard glitter letters (they already had adhesive on them but I painted wood glue on the back of them to make sure they'd stay on). I found this little owl a while back and bought it because I thought it was cute. The paint job on it was rough. I repainted this one to match the color scheme of her room.


Another simple thank-you card
Off and on, I have been selling some things on eBay. To add a personal touch to the orders when I ship them, I make a thank you card to add in the package. This one is cute and was super simple to make! I found some cards in my stash that already said "thank you" on them, in silver. For this card, I just added some paper flowers with brads in the center and there you go! Not everything handmade has to take hours to make!!! I have gotten some nice feedback from eBay customers about how much they appreciate getting a hand written thank you card.


Wedding gift and card
Some of our friends got married in March. This is the card that I made for them - I embossed the stamp of the couple with some metallic purple embossing powder to match the purple for their wedding. Their gift was a set of personalized wooden utensils from www.personalizationmall.com. I just left the utensils in the bag that they came in and added a cute bow around the handles.


An owl of a different color
Lately, I have become obsessed with owls! Mostly cartoon-y ones but owls, none the less. I have been slowly changing the decor in my bathroom to include owls. Knowing that, James's cousin and MY friend gave me this adorable 1980's (??) owl as an "Easter gift". While looking around in the stores, I have noticed that most home decorations these days are mono-chromatic, which I really love! I decided that this little guy belonged in my bathroom but certainly not as he was. SO, I found some spray paint that I liked and gave him a makeover! Yes, he now lives on the counter in my bathroom. He is has so much personality and I just love how he turned out!!!!


Sunday, March 17, 2013
Hair Bow Frame
I found this cute idea while wandering through Hobby Lobby one day - an empty frame with ribbons to hold hair bows. The price tag was $30! Sure, they always run sales and coupons, but (a) I knew that I could make one and (b) I knew that I could make it for WAY cheaper (even if I got it for half off at Hobby Lobby!). I found the generic frame at Wal-Mart for $3.97. It was empty and in a display with some posters/matted photos. I had the ribbon at home, which I believe was even given to me after one of my baby showers?! If I owned a staple gun, I would have stapled the ribbon to the back/inside of the frame but since I don't own one, I used Weldbond "More than Great Glue!" - one of my favorite products, it has a forever home in my kitchen junk drawer. Viola! A cute, easy way to store Ryann's ever growing bow collection and as a bonus, it looks really cute as a decoration hanging on her wall!!


Princess Castle
I REALLY wish that I could take credit for this gem but, alas, I didn't make it. My best friend made this just by looking at a picture of another one. Well, ok, she made TWO of them - one for me, one for herself. I just LOVE this and can't wait to get it in my scrapbook!!! Below is the link to the 2-page layout picture that she used to make these adorable castles!
Teri's Version

http://www.licketysplitscrapbooks.com/store/image-window.asp?pic=princessleft.JPG&w=587

http://www.licketysplitscrapbooks.com/store/image-window.asp?pic=princessleft.JPG&w=587
Owl card
To buy cards, even just blank cards, is so expensive! I don't have much time to make cards, but I try to make a few here and there - mainly to save money but also because I have so much scrap booking stuff that I have everything I TO make them. Here is a simple one that I made to send to my mom as a Thank-you from Ryann. I am obsessed with owls these days and this adorable stamp was found at Wal-Mart after Valentines day for TEN CENTS! How could I pass it up?!?!? I cut the stamped owl out and used pop dots to give it some dimension. I used Glaze gel pens for the hearts and the beak to give it even more dimension.


Saturday, February 16, 2013
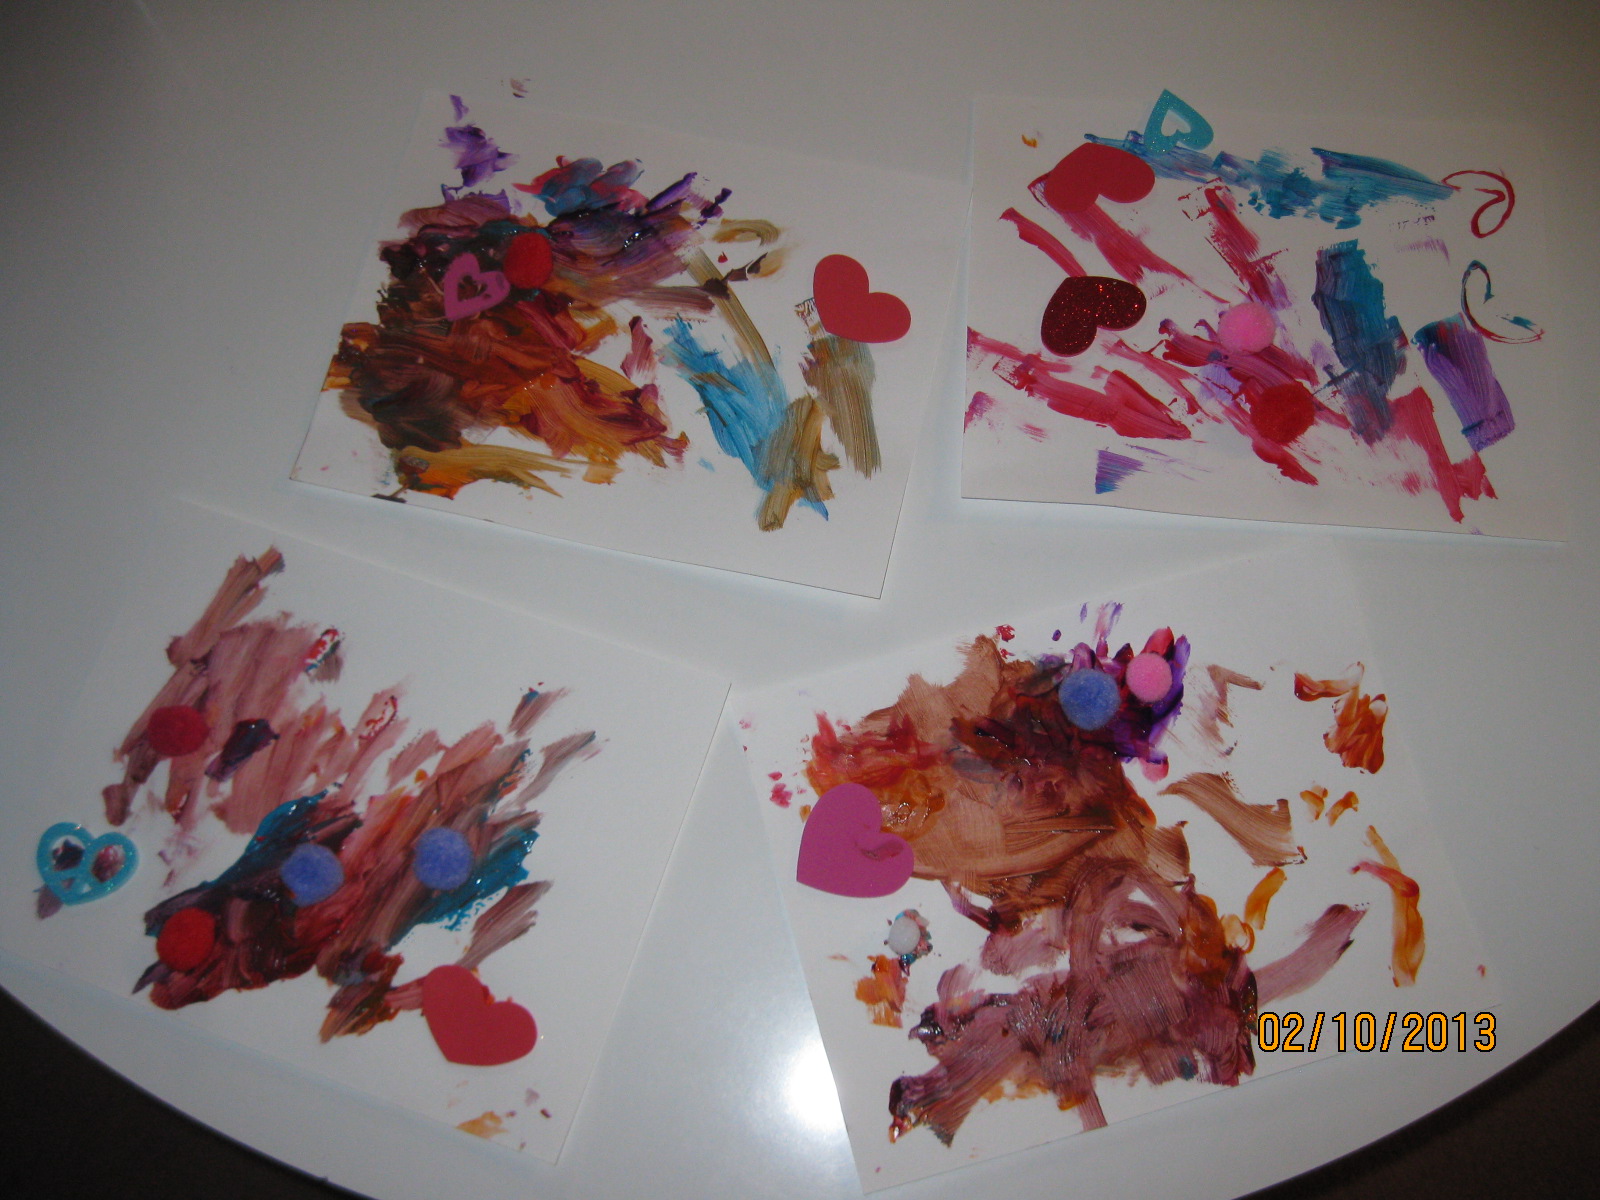
Valentine Gifts, by Ryann
It's so easy to have gifts for the Grandparents when you have a 2 year old with sweet little hands and one who likes to do crafts! We had our first adventure with finger painting, which went very well. She was ok with getting her hands dirty but did prefer to use a foam paint brush, as she could get more paint on there at once. She did a great job, had lots of patience and completed 4 masterpieces (one for Granny & Poppy, One for Daddy and one for Momma, which will ultimately end up in her scrapbook). The card was an idea that I got from?! Pinterest. You guessed it! (http://www.allfreekidscrafts.com/Kids-Valentines-Day-Crafts/Hand-Print-on-My-Heart-Card#). Inside the heart, it says "You've left a handprint on my heart". I used a K&Co. blank card (4x6), traced her hand onto the outside of the card, used a paint brush to apply the glue (even though the instructions say to put the kids hand into the glue - I figured that would be a crazy mess), sprinkled it with red glitter and then used super glue (was hard to get anything else to stick!) to attach the cute accordion piece to the palm of the hand. To mail these cards, I paper clipped the accordion together so that it didn't tear as it was coming out of the envelope. The final gift is another print out like the one I used one of our tea party crafts. This one is an adorable owl, my personal fave. We used purple finger paint, per Ryann's request and used her hand prints for the wings. Added the words "Owl love you forever" and viola! Super easy, Ryann had fun and because they were made my our adorable princess, they will gifts that all of the grandparents will treasure!


Two super simple cards
I have tons of stamps, that, until recently, I didn't use very much. What I've come to realize is that they make it super easy to put together a hand made card! These 2 are super easy - a couple of stamps and one has a piece of ribbon. No big deal though I think they are cute, especially for cards that didn't take any time at all to make!


Thursday, February 14, 2013
"Special Dates"
I saw this idea on Pinterest and the link on there took me to an etsy store. On etsy, the lady was charging $14.95! I couldn't believe it! I used her idea, printed it out on some cardstock and put it in a $5 frame from Wal-Mart. I feel that mine is just as fancy and it didn't cost a fortune to make! Only problem is, I have no idea where I'm going to hang this, as my walls are FULL plus they are plaster walls, which makes it next to impossible to put a nail in. I'll figure it out.
"

Sunday, February 10, 2013
Kids' Valentine/Tea Party
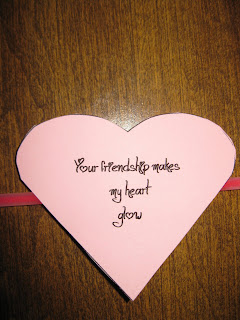
Valentine party invitations: Of course, they are way cuter than what the camera can capture! Red card stock base, red & pink heart paper, edges cut with scalloped scissors, red heart punched out on glitter card stock, small epoxy heart sticker in middle, "you're invited" on a small piece of pink card stock. The heart & "you're invited" are raised with pop dots for effect. I found this cute idea for glow stick Valentine's (http://spoonful.com/crafts/hearts-aglow). SUPER easy (and cheap!) to make! I printed the bigger hearts from a Word document, using the AutoShape function and the 'Jellyka - Love and Passion font that I got for free.(http://www.kevinandamanda.com/fonts/freescrapbookfonts/) The heart says "Your Friendship makes my heart glow" on the front and "Happy Valentine's Day, Love Ryann" on the back. I used a Stampin' Up heart punch for the "arrow" pieces. I have only used Tombow adhesive to keep them attached to the glow stick, which isn't working out as well as I'd hoped, but I figure the kids won't keep them on for long anyway. I also made gift bags for each girl - I used a Sizzix die for the hearts, on plain pink bags and wrote the girls' names with glitter glue. Nothing fancy.


The menu?! Pink hot chocolate,(http://barbarabeerykidscooking.wordpress.com/2010/02/07/kids-valentine-recipe-pink-hot-chocolate/), popcorn chicken, BBQ wienies, jalapeno roll-ups, Mexican dip, pink (yello) cupcakes, heart-shaped cut out cookies. The hot chocolate wasn't as great as I wanted it to be! The girls did drink some, but it is not something I will be making again in the future. Live & learn, right?! The best part of it was that we had little espresso cups for them to drink out of, which was great for photos!
The party was a great success! All of the girls had so much fun! We made one easy craft - a pre-cut foam owl and a print out of an elephant that we used Washable Crayola finger paint to make a hand print for the elephant's ear. Fun and so easy to do!


Tuesday, February 5, 2013
Baby Girl card
One of my very good friends was just blessed to adopt a baby girl!! I am so excited for their family! I have a small box of things to send to them and made this card to go along with it. I used the Sizzix Baby Bottle die, Versamark Glue stamp pad with green and pink glitter and a "Princess" stamp with crown and metallic chalk for the shading. The glitter isn't as thick as I'd hoped, but I thought it was cute, in spite of that


Sunday, January 27, 2013
Some scrap book pages
I am trying REALLY hard not to be more than a year behind in my scrap booking, though that is hard to do. I am also trying not beat myself up about it. Today, I FINALLY finished scrapping Ryann's first year of life - I got her 1st birthday pages done (Two 2-page layouts)! YAY! As you recall, I made a Shutterfly book of her first birthday, so I didn't feel compelled to scrap every photo that was taken, which helped. In the second layout, the page on the right is a 12x12 print from Costco. I was very pleased with how well it turned out and what an easy way to get a page completed! =) I was also able to finally put in a page that has been done for a LONG time - a page with a photo from each month of her first year. I was so excited to do that page that once I got her 12 month photo printed, I got that page finished and it has just been waiting for a home in her scrap book. Here are some pics of the pages I did today:


Saturday, January 26, 2013
So, it's not a craft, but it IS a project....
Ryann was big enough last year to explore and be amazed with all that is outside - the grass, bugs, sticks, trees, leaves...and flowers! She got to the point where she would sniff anything that remotely resembled a flower. There's a small piece of "land" at the back corner of our property. To be honest, we don't know if it belongs to us or to our neighbors, but they are nice enough people that we can agree to share it. =) It was just a dirt patch, not even any grass growing in it. I did my best to shape the little area and then, as we'd find seeds, etc, Ryann and I would take them out back to plant them. We didn't get any much rain and we had to water it a LOT but nothing really came up. We transplanted some brown-eyed susans from another flower bed and my MIL brought over some daisies, so we'll see what happens this year. The "project" I'm referring to in this post is a little seedling patch Ryann and I started January 24, 2013 . We got the Jiffy "greeenhouse" and 3 packets of seeds at the grocery store. We bought a wildflower mix, Butterfly bush and Gallardia. The Gallardia & the wildflowers are both sprouting. The ones that are going crazy, though I shouldn't be shocked by this, are the wildflowers! You know the saying "Growing like a bad weed". Well, I suppose that wildflowers are technically weeds, right?! AND, might I add, my favorite kinds of flowers! I love the ones that are just here and there as you drive along the back roads. I have high hopes for "Ryann and Momma's flower garden" this year. I don't even pretend to have a green thumb, but you just never know....


Monday, January 7, 2013
Snowman Pumpkin & Baby shower gift
This year, Ryann was old enough to really get into Fall - the leaves changing colors & falling off the trees and, most importantly, she became absolutely infatuated with pumpkins "Gumpins" and Jack-O-Lanterns"Jack-o-Wackins!!! Daddy carved a Jack-O-Lantern and she thought that was so exciting! At James' work, they had a pumpkin decorating contest. He LOVES doing this stuff and decided that his team was going to do a Stay Puft Marshmallow Man pumpkin (they actually had a WHITE pumpkin!). Ryann was so in love with that pumpkin that she got upset when I mentioned throwing it away. Taking the Stay Puft hat off of it, concocting a "top hat" and a button nose, it easily became a snowman gumpin! The pumpkin finally made it's way into the trash this past Friday.
I also had a baby shower to go to in November! This shower was for James' dad's cousin's daughter-in-law. (did you get that???). Megan was expecting baby Archer at the end of December. We haven't had many boys around us lately - just about everyone we know has had baby girls in the past several years! My mother in law had this shadow box that she wasn't going to use for anything and offered it up to. I found an idea on Pinterest (though I could have totally come up with it on my own) and altered it a bit. I was very pleased with how it turned out! I glued a piece of scrap paper to the back of the shadow box, added a journaling block, painted a wooden letter "A" (for Archer) in red and added a small photo frame that she can change photos/put a newborn pic in, etc. I was very pleased with this gift!

Owl Jack-O-Lantern. James is a beast @ carving pumpkins!

Stay Puft Marshmallow Man pumpkin

Snowman pumpkin

Baby Shower shadow box


Tuesday, November 6, 2012
Eight Year Anniversary scrap book page
Thanks to the suggestion of my mother in law in 2005 (around the time of our 1st wedding anniversary), I have made it a point to take a picture of us on October 30th (ish) and make a scrap book page just for that event! I have a whole album devoted only to our anniversary pages. It is one of my favorite books - and I have SEVERAL! I don't know that I've ever posted one of these pages before but thought I'd share the one that I made for this year. We actually didn't get any pics of us ON our anniversary but there were some around that time that I felt were appropriate. Ryann was sick, so we didn't go out, but it all worked out just fine! (OH - and I finally took the time to figure out how to use my Cricut and made all of the embellishments. I'm pretty proud of myself) :)


Sunday, October 28, 2012
Baby Shower scrap book pages
I have been trying to work on my own scrap book (ok,RYANN's scrap book) but took some time out to make these pages for one of my best friends who was having her 2nd little girl! I did this to help her get started on her scrapbook for baby #2, as *I* know how hard it is to get scrap booking done for ONE child! These pages turned out pretty well, I think. I especially like the Christmas pages!!


Subscribe to:
Posts (Atom)